1 显示效果
给hugo博客添加天气预报的效果,其实不只是给hugo,所有博客都是通用的。
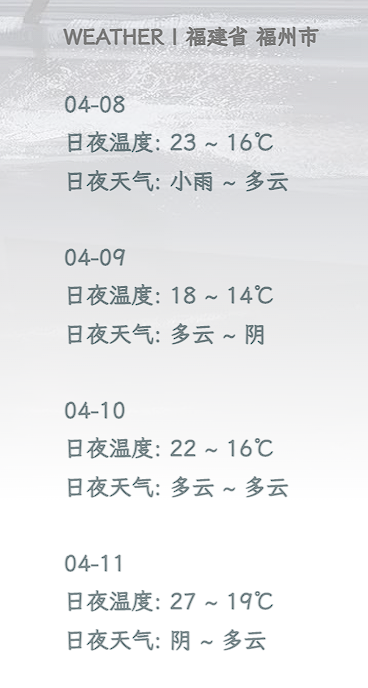
我自己想要一打开就能看到天气,所以增加了这个功能。可以根据你的IP显示城市,并且显示未来几天的天气预报。
显示效果是这样的:
2 解决方案
2.1 天气查询api
要显示天气就必须有天气预报的api,查了一下发现高德开放平台有天气的api 天气查询 ,于是就开始马不停蹄地添加到博客上。
2.1.1 申请key
首先,打开高德开放平台注册账号,或者用高德地图扫码。
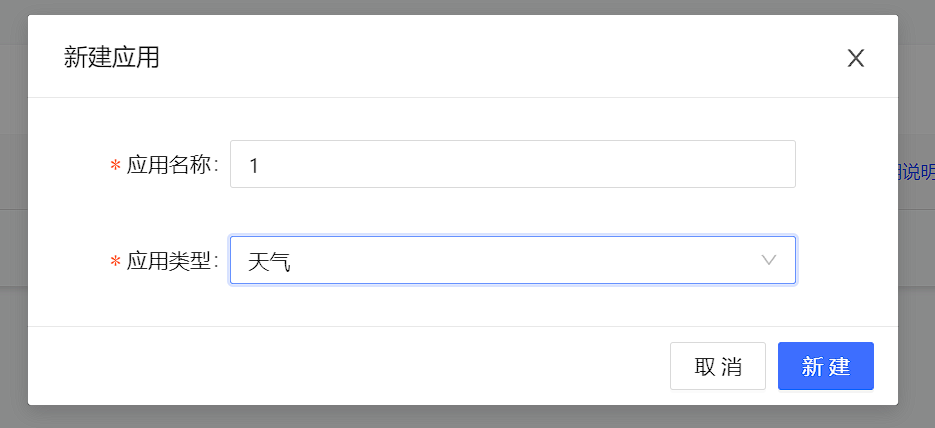
然后,进入控制台,选择创建新应用,应用类型选择天气。
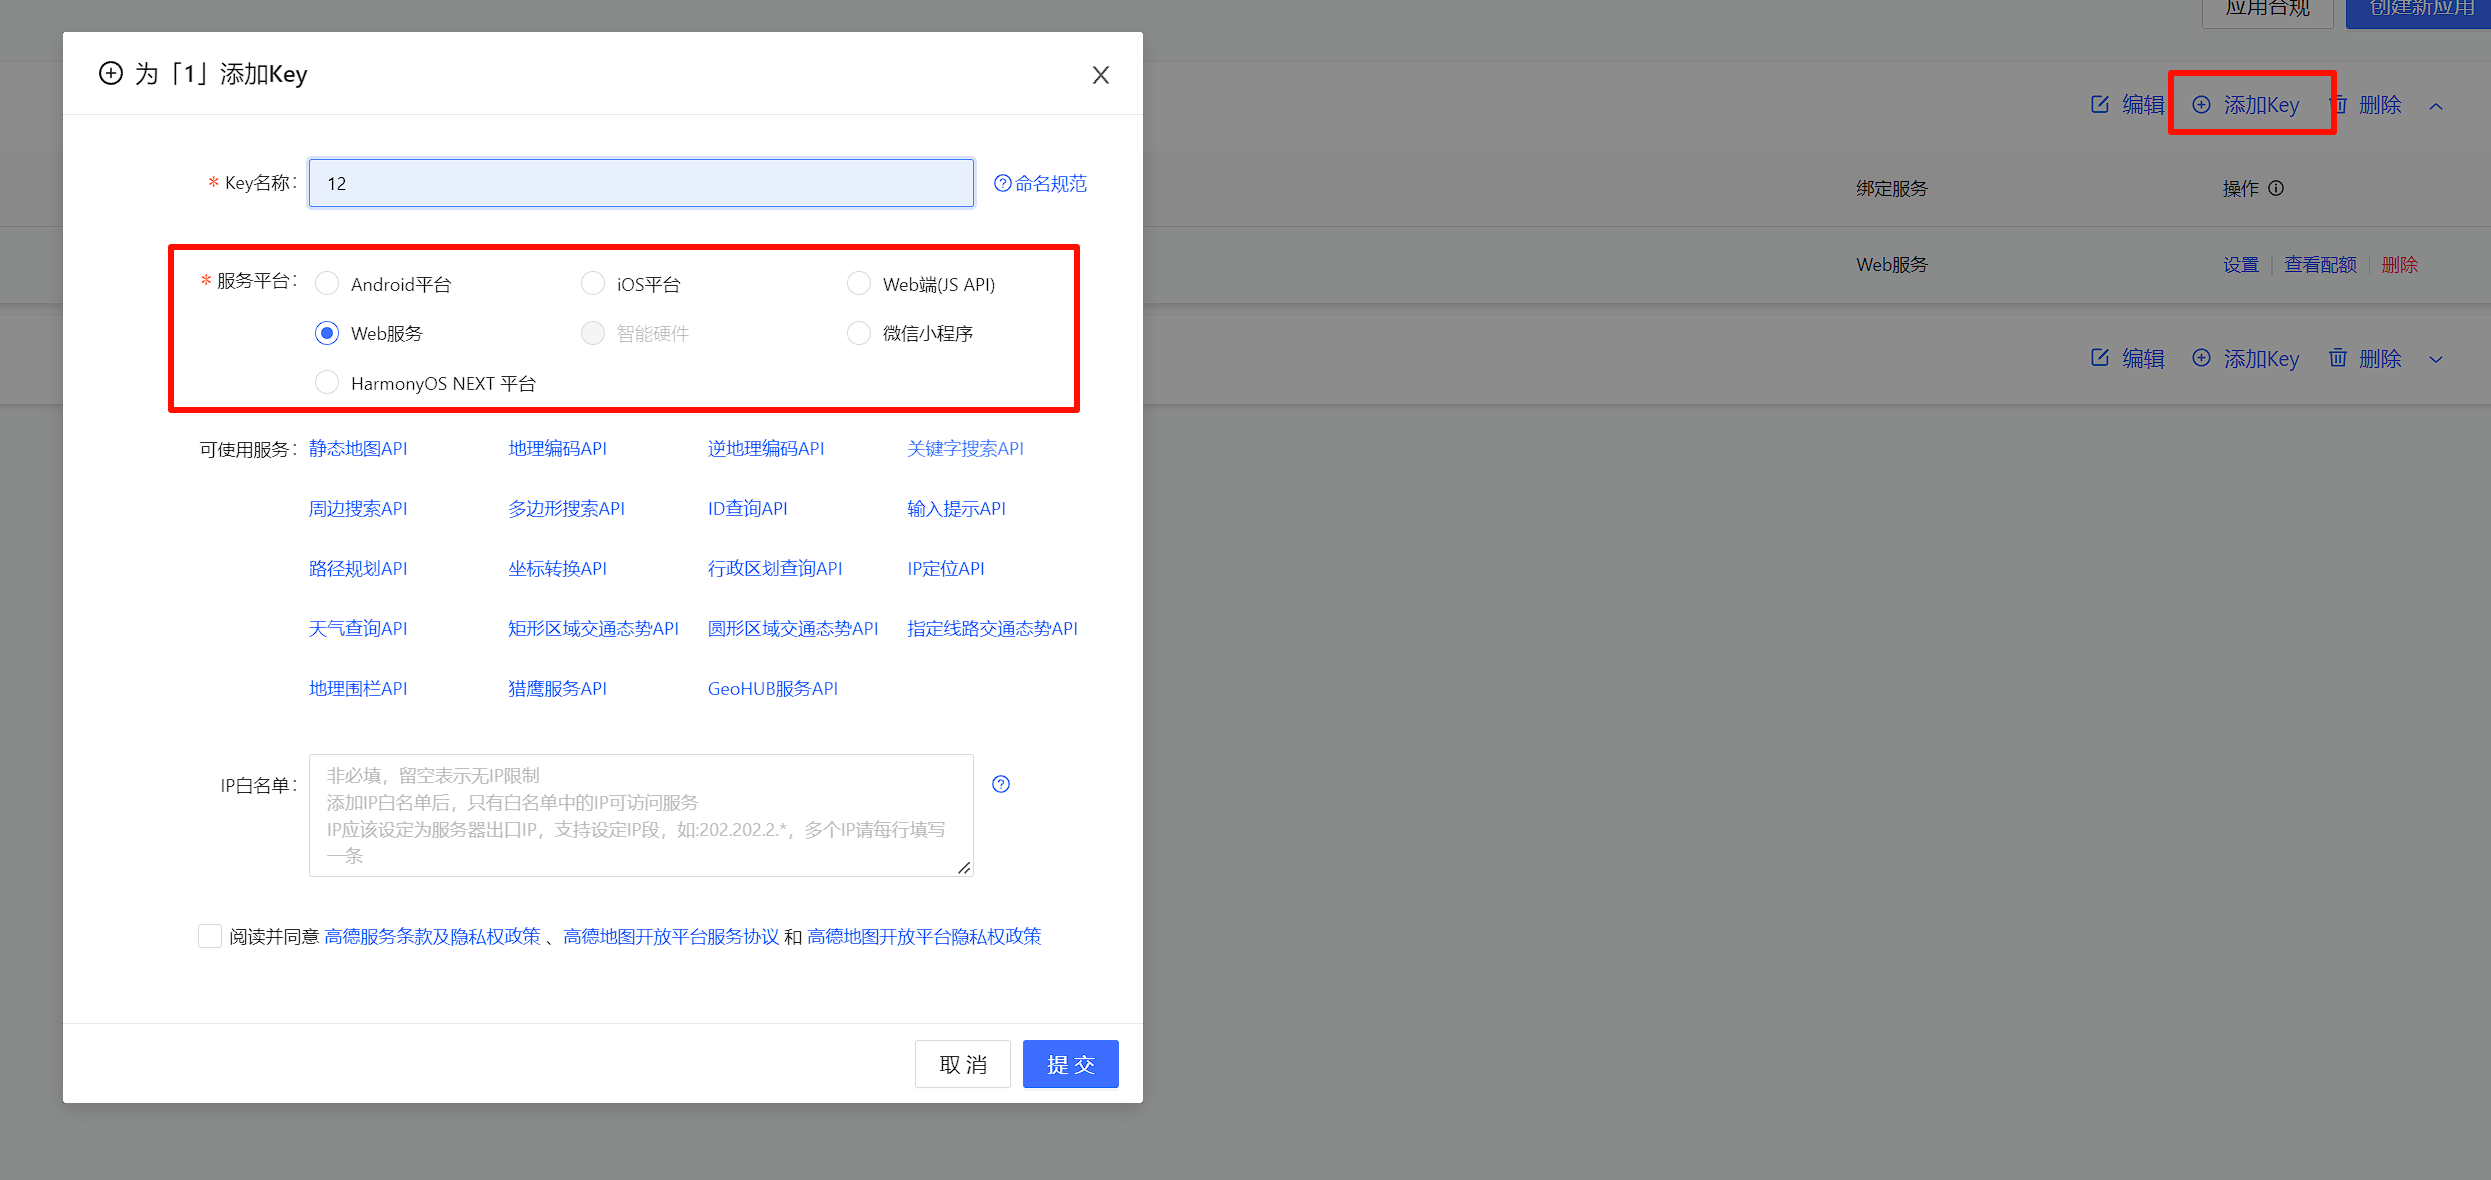
创建好应用以后,选择右上角的添加key,然后 服务平台中选择web服务就行了。可以看到下面的可使用服务是很广的,这一个key就可以同时用于这些服务上面。
提交以后,就会显示你的key,这个key就可以用在api的参数里面了。
2.1.2 api使用
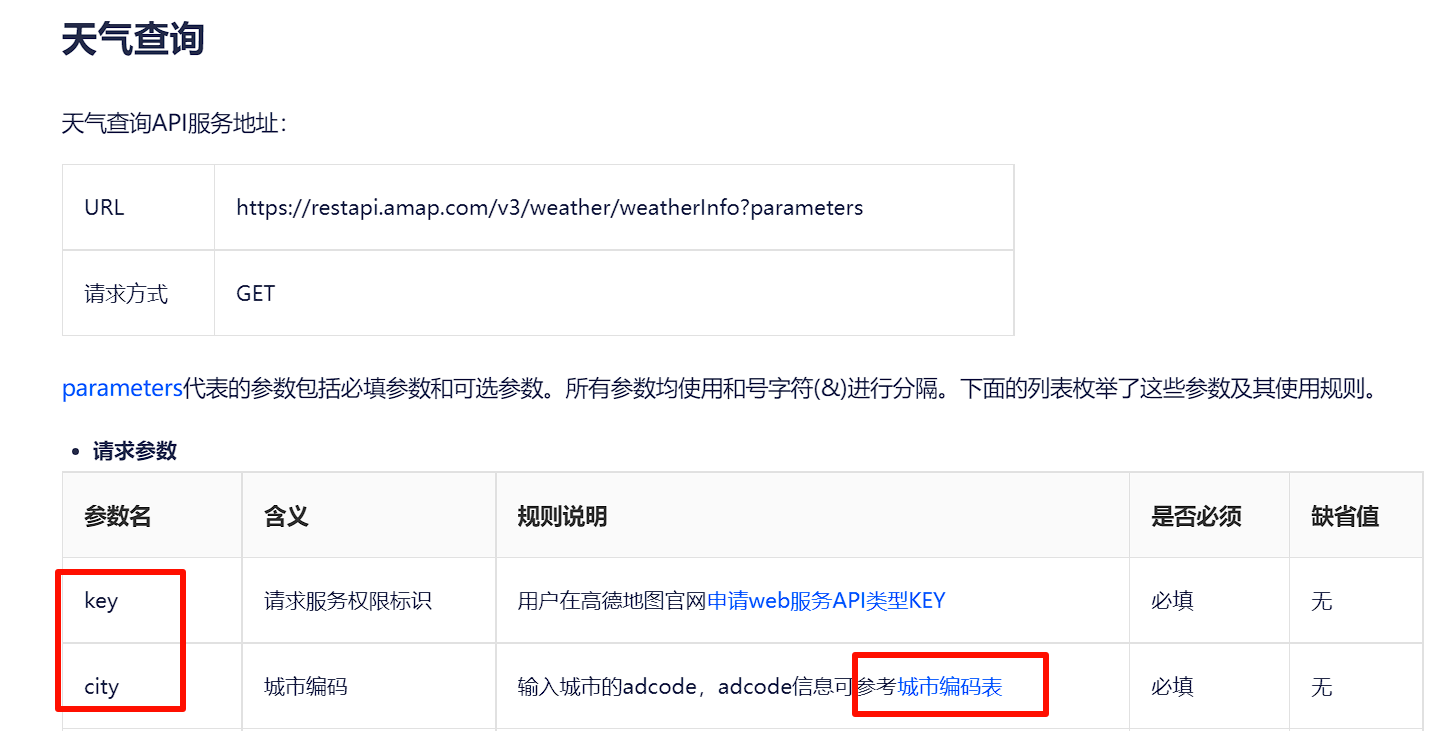
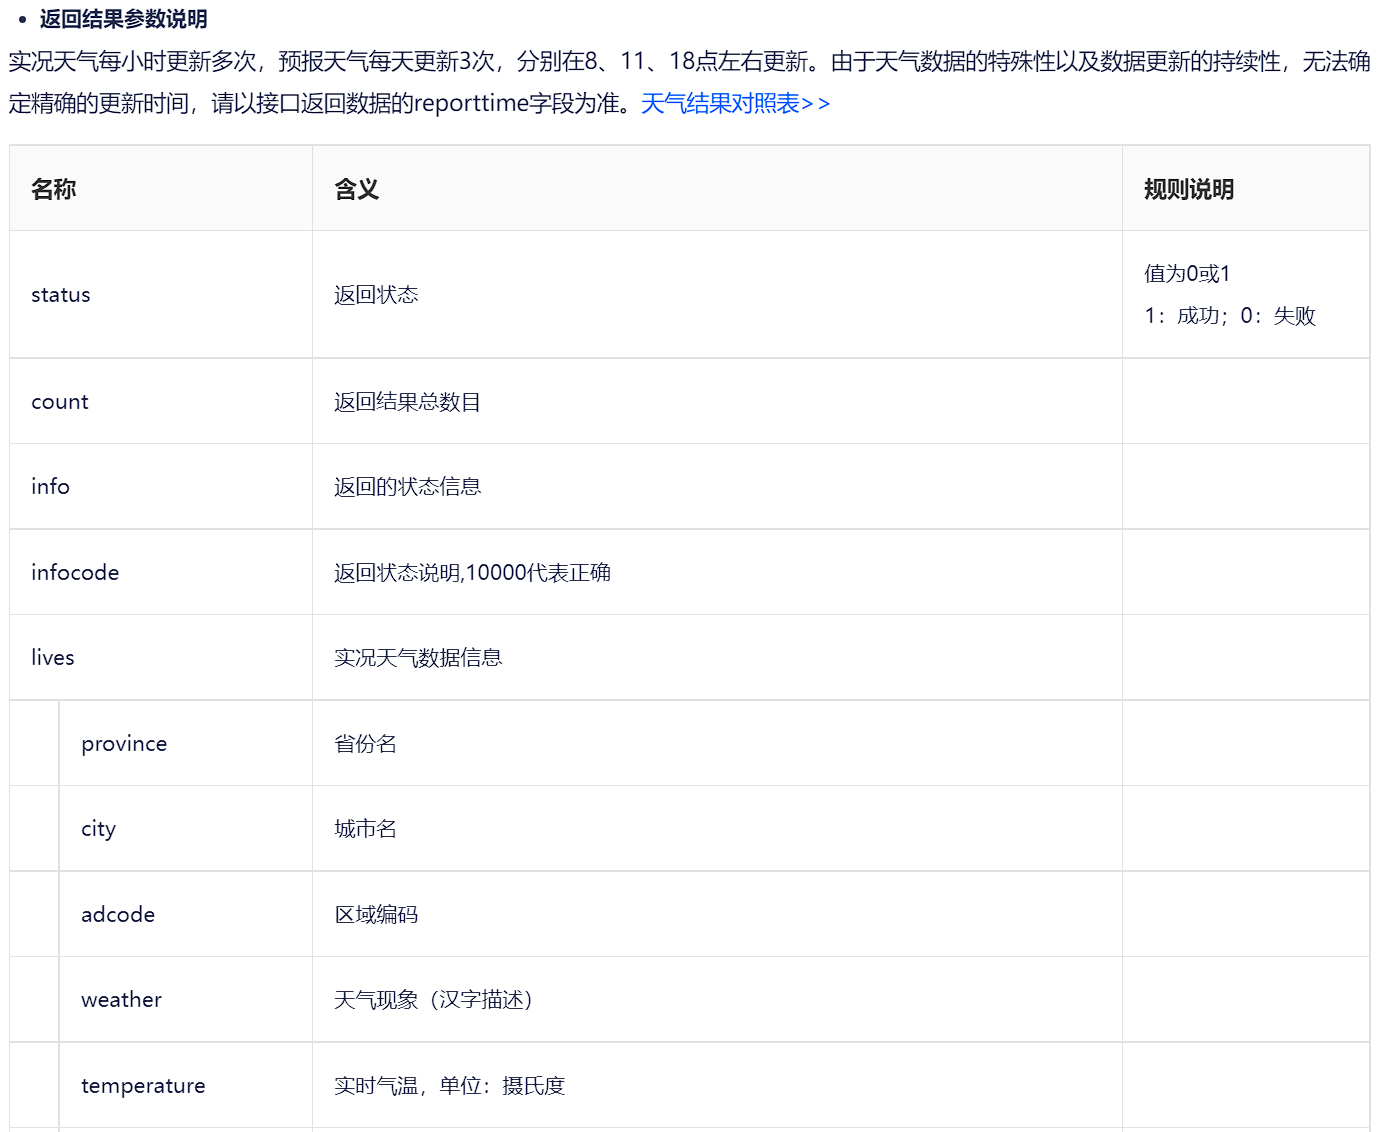
api的使用就是按照api文档来就行了,其中key和city是必须的参数,city参数可以从城市编码表中获取。
返回的结果有很多,在api文档也能看到,选取你需要的参数就行了。
2.2 IP定位api
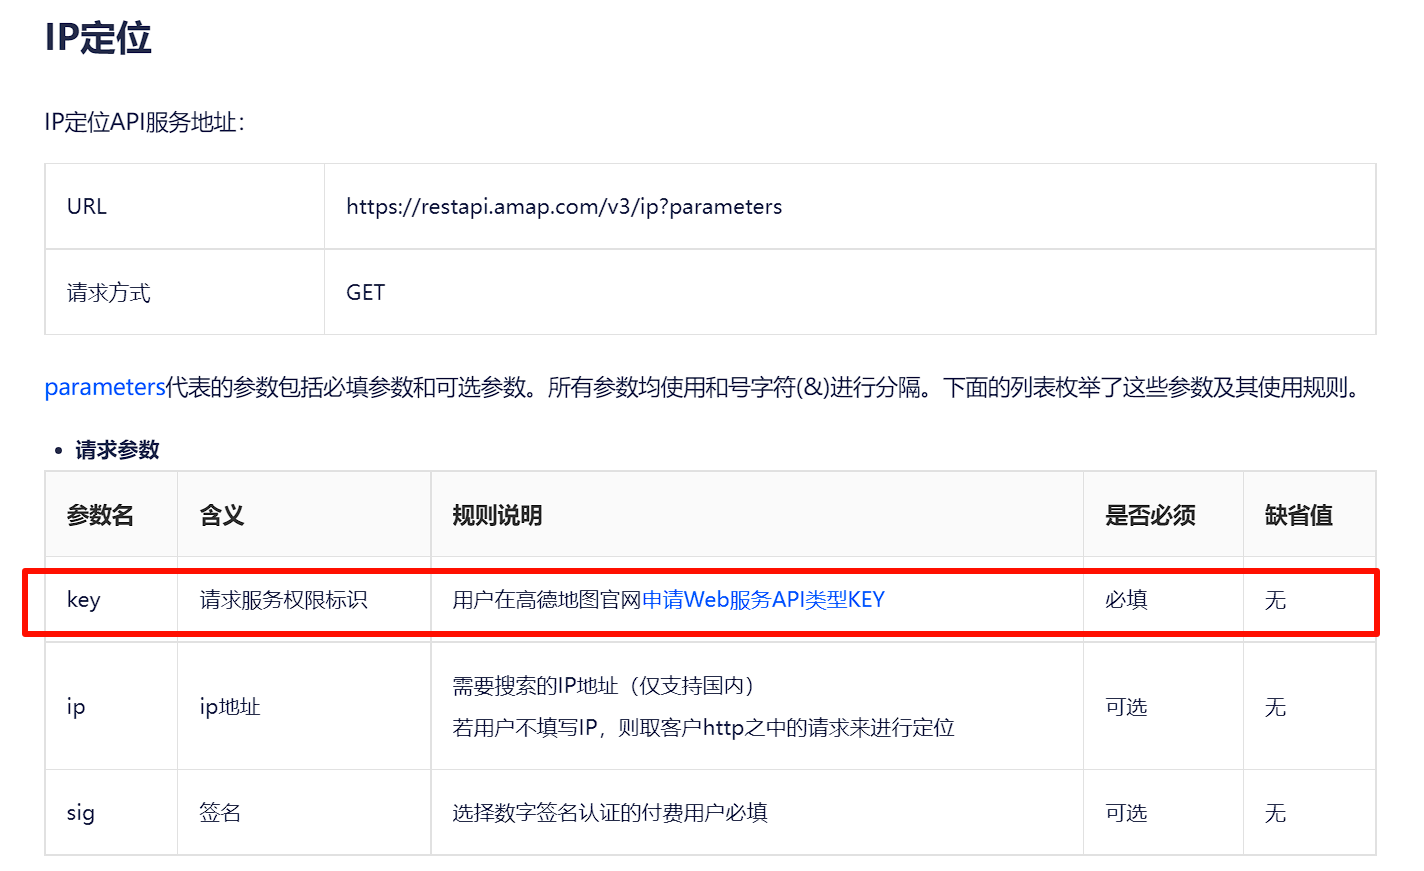
如果只需要固定显示一个地方的天气,那么直接在请求中硬编码输入城市的编码就行了,但是我想要自动定位IP,那么就可以用到高德开放平台的另一个api,IP定位 。
必填的参数就一个,你的key。刚才申请的key也可以用于这里。
2.3 页面展示
添加\layouts\partials\weather.html,完整的html代码在下面,将api里面的yourkey替换成你自己的key就可以了。
 1<style>
 2    .weatherReport {
 3       font-size: 15px;
 4       color: #1f373c8c;
 5    }
 6</style>
 7<h5 class="locationInfo" id="locationInfo"></h5>
 8<span class="weatherReport" id="weatherReport"></span>
 9
10<script>
11    const apicityUrl = 'https://restapi.amap.com/v3/ip?key=yourkey';
12    const apiUrlTemplate = 'https://restapi.amap.com/v3/weather/weatherInfo?city=350103&key=yourkey&extensions=all';
13
14    fetch(apicityUrl)
15        .then(response => response.json())
16        .then(data => {
17            const province = data.province;
18            const city = data.city;
19            const adcode = data.adcode;
20
21            // 显示省份和城市信息
22            document.getElementById('locationInfo').innerHTML = `WEATHER | ${province} ${city}`;
23
24            // 将 adcode 插入到 apiUrl 中
25            const apiUrl = apiUrlTemplate.replace('{adcode}', adcode);
26
27            // 使用新的 apiUrl 获取天气信息
28            return fetch(apiUrl);
29        })
30        .then(response => response.json())
31    .then(data => {
32        if (data.status === "1" && data.count === "1") {
33            const forecast = data.forecasts[0];
34            const reportTime = forecast.reporttime;
35            const city = forecast.city;
36            const province = forecast.province;
37
38            let weatherReport = ``;
39
40        forecast.casts.forEach((cast, index) => {
41            const date = cast.date;
42            const parts = date.split("-");
43            const newDate = parts.slice(1).join("-");
44            const nightWeather = cast.nightweather;
45            const dayWeather = cast.dayweather;
46            const daytemp = cast.daytemp;
47            const nighttemp = cast.nighttemp;
48
49            // 检查是否是第一个预报
50            if (index === 0) {
51                // 如果是第一个预报,不添加 <br>
52                weatherReport += `${newDate}<br>日夜温度: ${daytemp} ~ ${nighttemp}℃<br>日夜天气: ${nightWeather} ~ ${dayWeather}<br>`;
53            } else {
54                // 如果不是第一个预报,添加 <br>
55                weatherReport += `<br>${newDate}<br>日夜温度: ${daytemp} ~ ${nighttemp}℃<br>日夜天气: ${nightWeather} ~ ${dayWeather}<br>`;
56            }
57        });
58
59
60            document.getElementById('weatherReport').innerHTML = weatherReport;
61        } else {
62            console.error('Error fetching weather data');
63        }
64    })
65    .catch(error => console.error('Error:', error));
66</script>
因为我是放在侧边栏,所以在\layouts\partials\sidebar.html文件中,添加以下代码:
1<!-- WEATHER -->
2<section>
3    <hr>
4{{ partial "weather" . }}
5</section>
如果想放在别的位置,也可以自己调整位置。
以上。
.jpg)
